- Natto
- Make Wara Natto
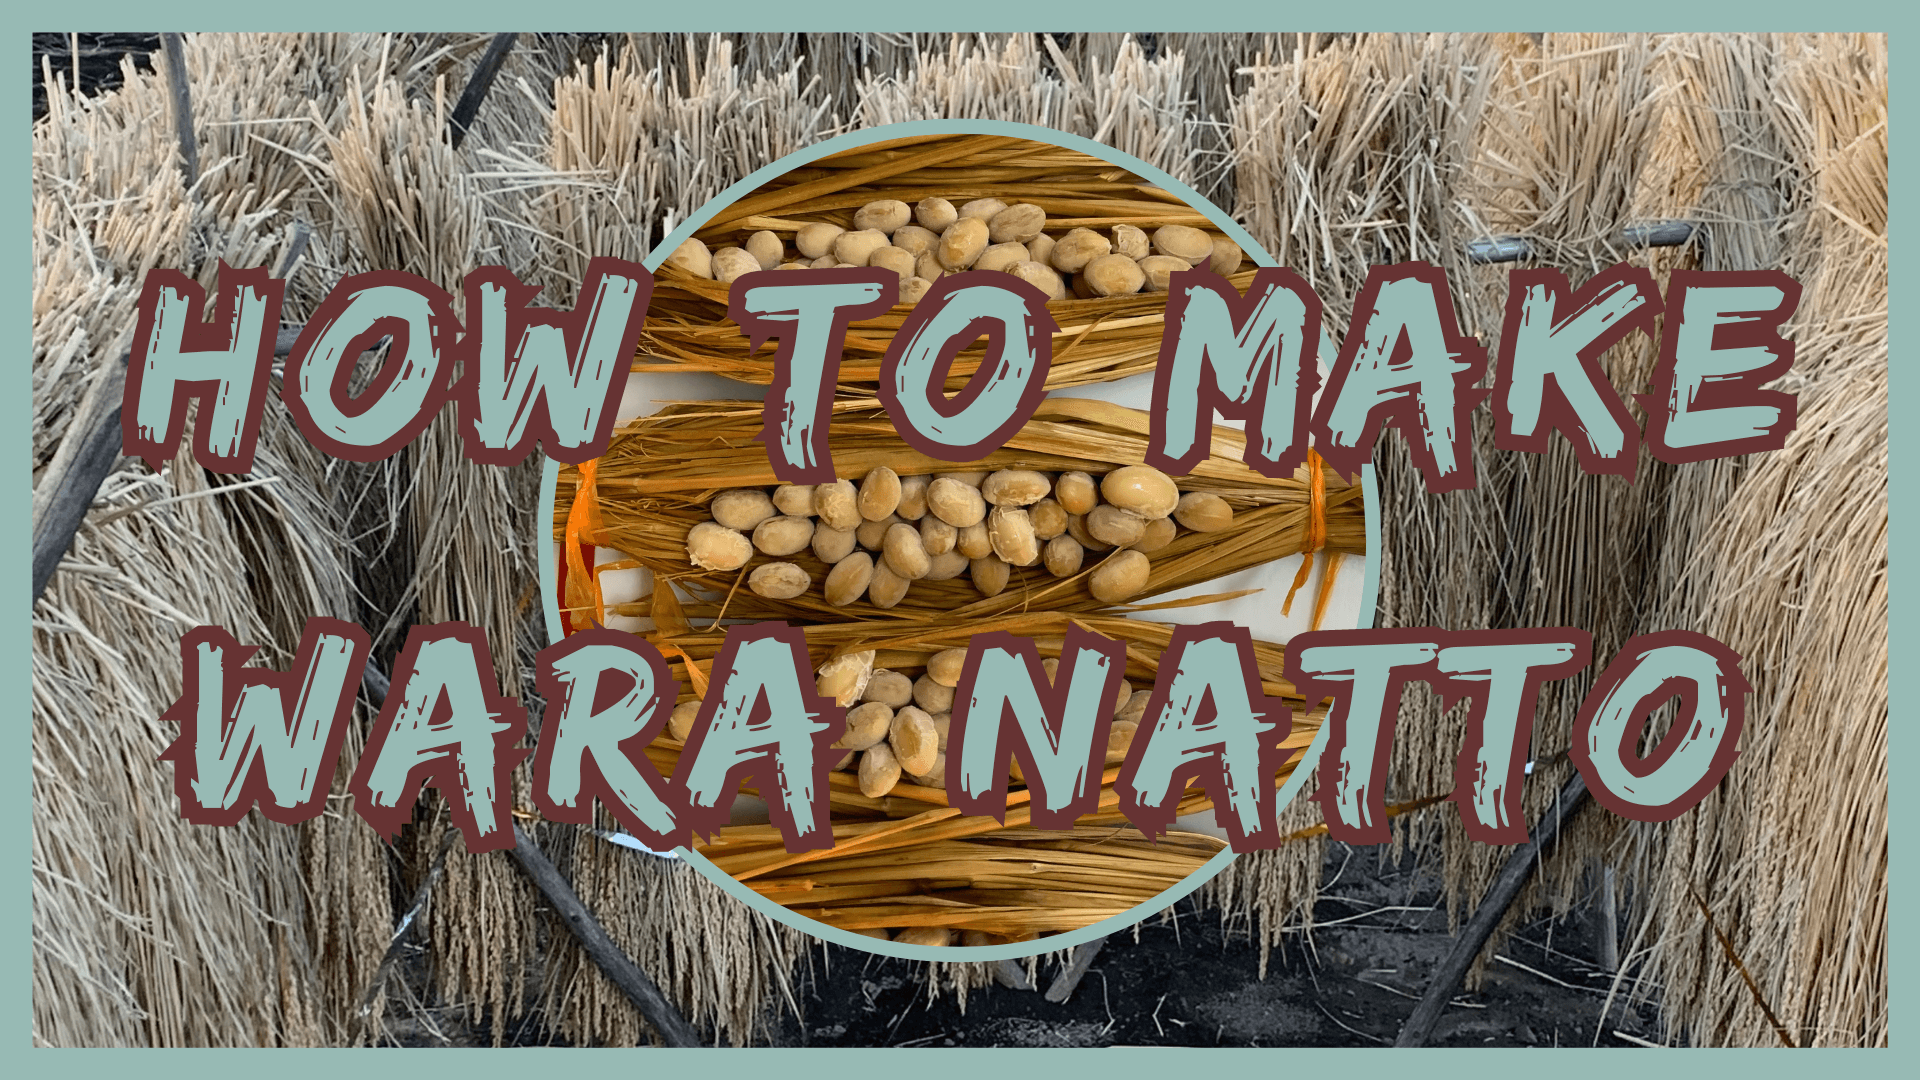
How to Make Wara Natto
Simply Natto is a participant in the Amazon Services LLC Associates Program,
and as an Amazon Associate I earn from qualifying purchases.
Let's learn how to make wara natto.
I'm going to teach you how to make your own traditional-style sticky, stringy beans using rice straw and modern equipment.
For centuries, Japanese natto has been made using rice straw, and now you can make it too.
Making fermented soybeans with rice straw isn't as difficult as it sounds, and all you need are a few things to create your very own homemade wara natto.
Here are the things you'll need before getting started:
- Wara (rice straw)
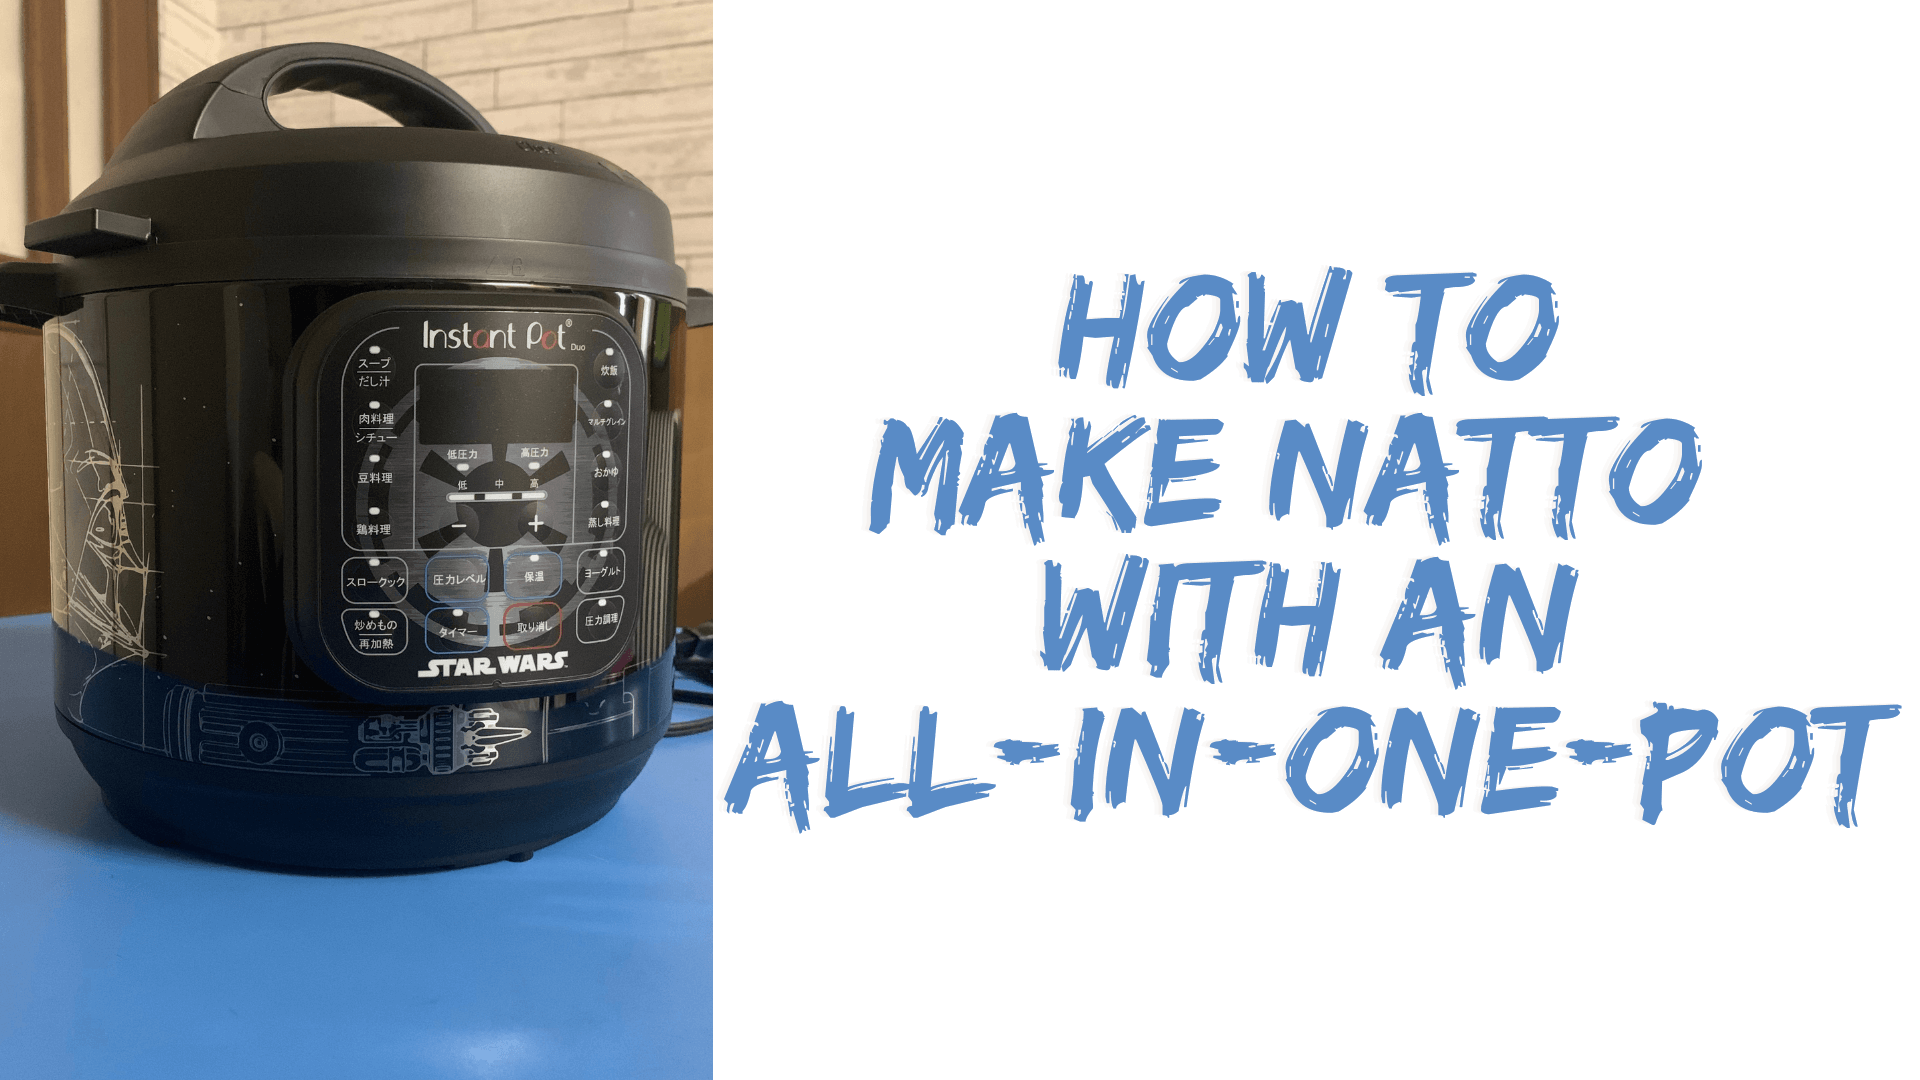
- All-In-One-Pot
- Extra stainless pot (sterilized)
- Soybeans
- Thermal bag for fermenting (container)
- Hand warmers
- Bowl for soaking the soybeans
- Strainer
- Steaming basket
- Measuring cup
- Measuring spoon (10ml)
- Stirring spoon
With the necessary items on the list prepared, you're ready to make your own rice straw fermented soybeans in 6 easy steps.
Step #1: Wash the Soybeans
Step #2: Sterilize Cooking Utensils
Step #3: Steam the Soybeans
Step #4: Prepare "Wara Canoes"
Step #5: Ferment the Soybeans
Step #6: Refrigerate the Natto
Are you ready to start making some Japanese Wara Natto Goodness?
Then Step One awaits!
Natto Talk
Want to chat about Japanese fermented soybeans and how you can better enjoy this Japanese superfood?
Subscribe to Natto Talk!
A monthly publication containing info about:
- Things relating to natto
- Simply Natto's "Natto Recipe of the Month"
- Japan and its culture
- Updates made to the Simply Natto website and its social media pages
- Any upcoming product drops or projects
So what are you waiting for?
Fill out the form below and join.
I look forward to sharing my natto journey with you and learning about yours.

Simply Natto: Natto Lingo

作り方
(tsukurikata)
"tsue-coo-ree-kaw-tah"
- how to make
大豆
(daizu)
"dye-zoo"
- soybeans
手作り
(tezukuri)
"teh-zoo-coo-ree"
(slightly roll the "r" in "ree")
- homemade, handmade
藁
(wara)
“wa-raw"
(slightly roll the "r" in "raw")
- rice straw
How to Make Wara Natto - Step One
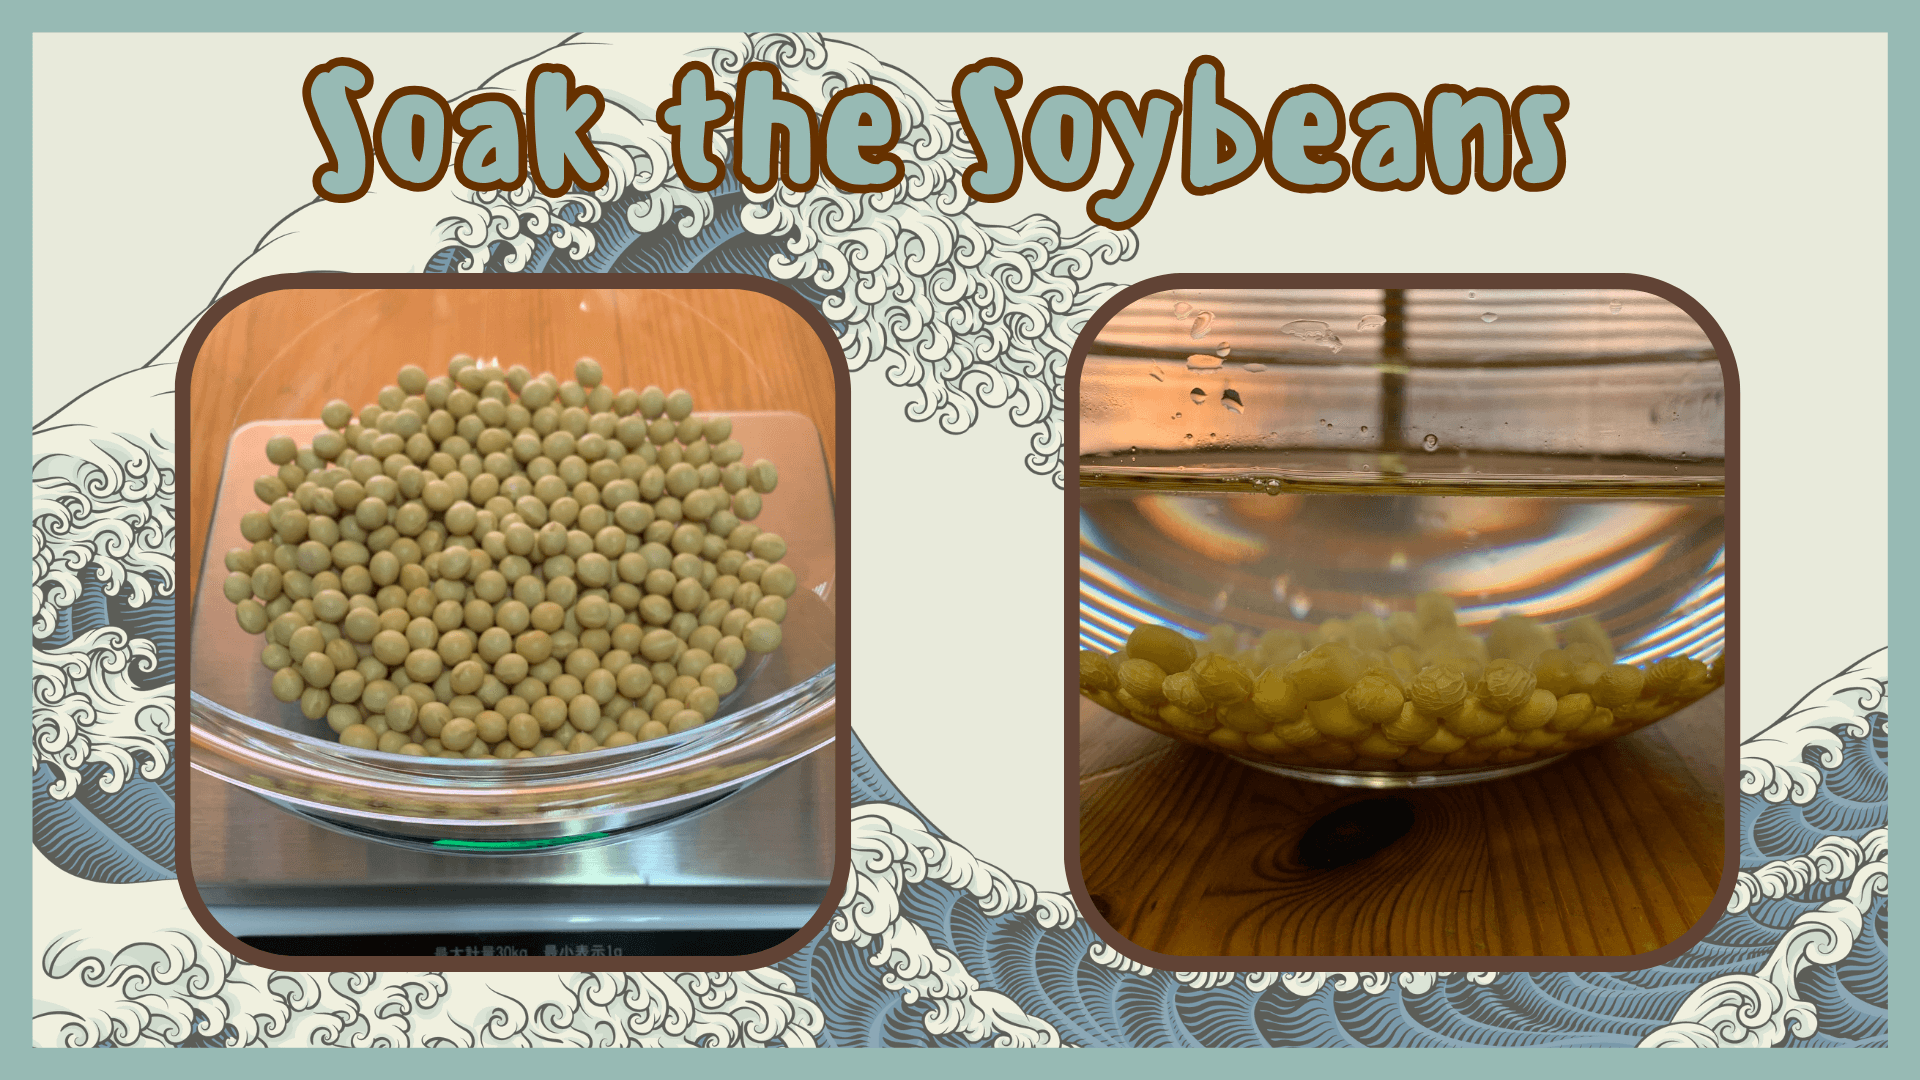
The first step is to wash the soybeans.
Measure out the amount of beans you want to turn into natto and put them into a large bowl for washing.
I recommend starting out with 200g.
This will give you enough beans to fill about 5-6 "Wara Natto Canoes."
The packages of natto sold here in Japan generally contain 40-50g, and most Japanese people (including myself) feel eating one package in a day is sufficient.
Put your soybeans into a bowl and slowly fill it with water.
While being careful not to peel off any of the skin around the soybeans, gently move the beans around under the water with your hand.
If any skin does fall off just remove it from the bowl.
Drain the water from the bowl and repeat the washing process 1-2 more times.
After draining the water, refill the bowl with 1000ml (4 cups) of cold water for soaking.
The beans should be submerged under the cold water and soaked for 18-20 hours.
How to Make Wara Natto - Step Two
Now for some modern techniques and equipment.
The second step is sterilizing the stainless pot and stainless utensils.
While the soybeans are soaking, it's a good time to sterilize the stainless pot and stainless utensils you'll use when preparing your rice straw "canoes" for the fermenting process.
*This step is also good for the prevention of cross-contamination between the Bacillus subtilis natto and any possible bacteria left on the pot or stainless utensils.
Put the stainless pot into your machine and pour in 750ml (3 cups) of water.
Put your stainless steaming basket into the pot and place your stainless utensils in the basket.
Securely close the lid and make sure the vent is in the "Sealing" position.
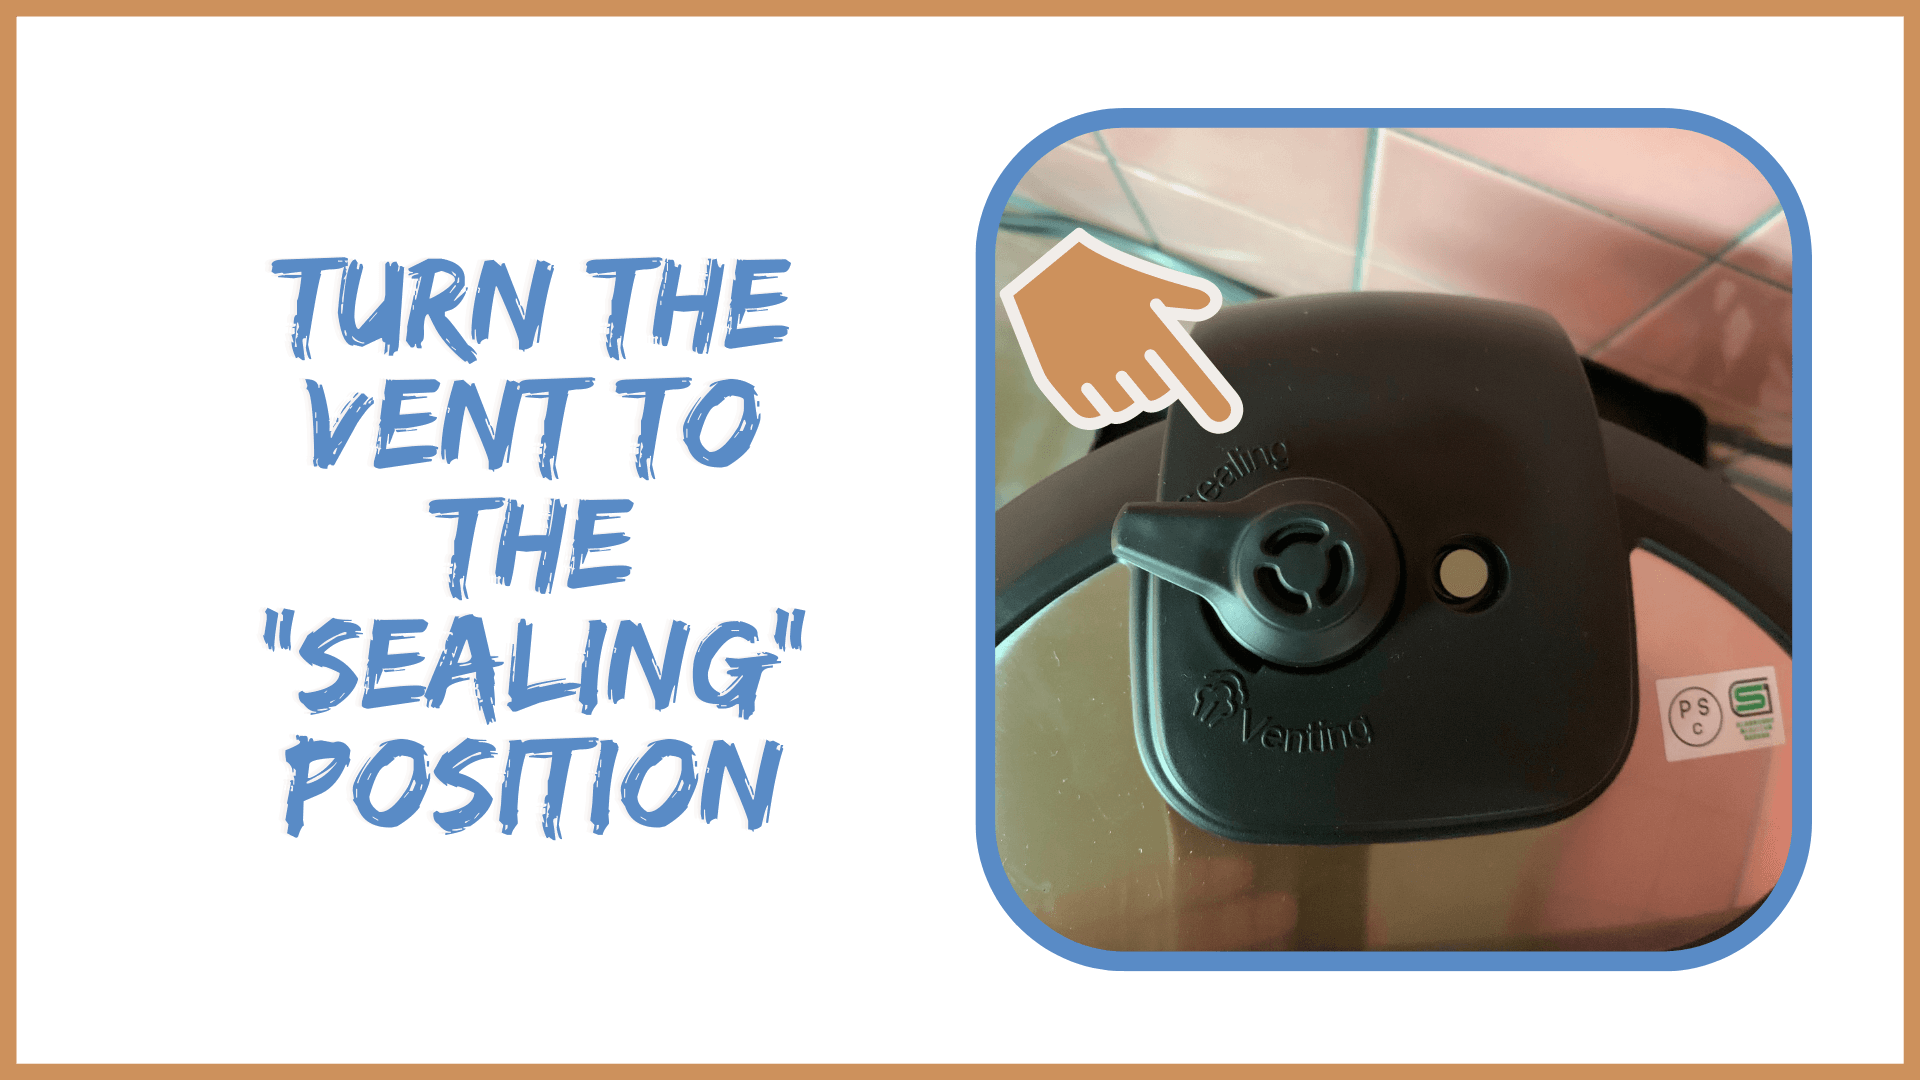
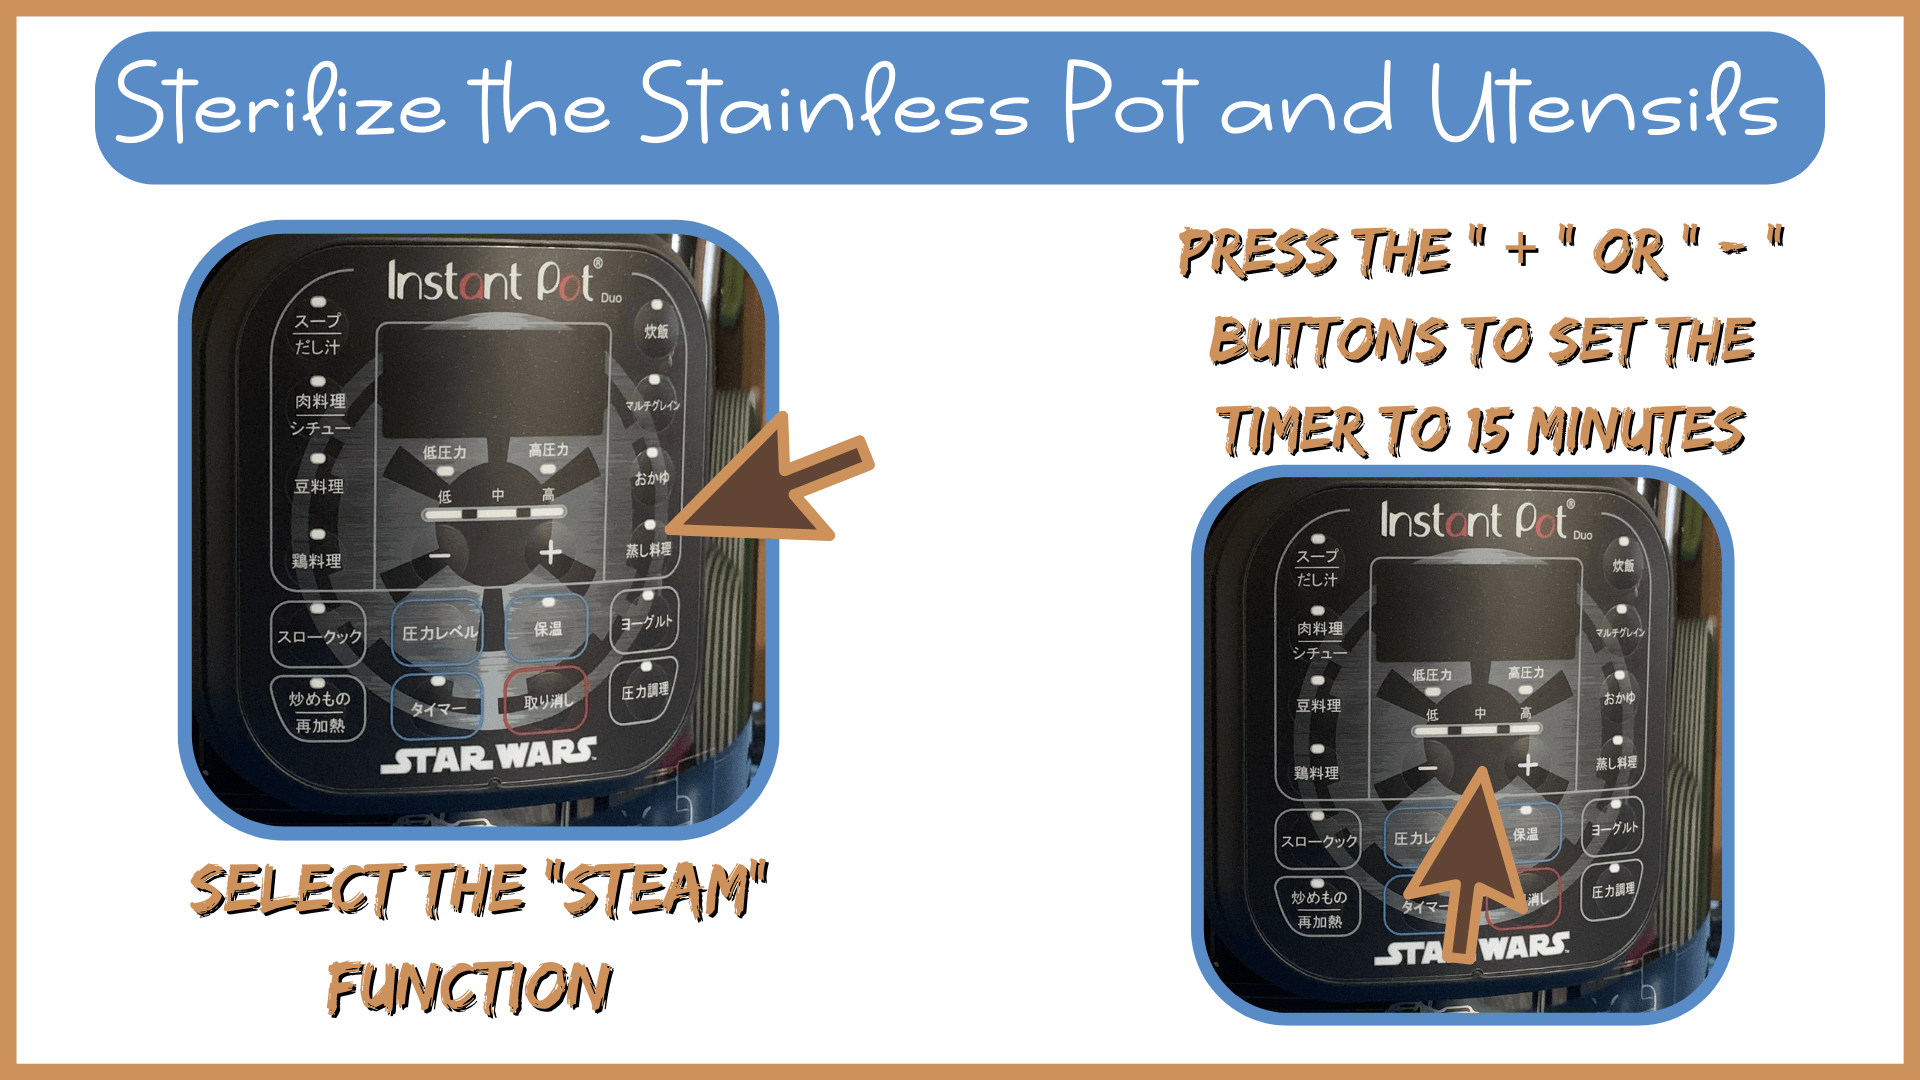
Select the "Steam" function and press the (+) or (-) buttons to set the timer to 15 minutes.
After a few seconds "On" will display on your all-in-one-pot screen.
It will take about 10 minutes or so for the 15-minute timer to be displayed and for the steaming to start.
**After the time is up don't open the lid right away.
The pressure inside your all-in-one-pot needs to be released and there are two ways you can do this.
The first way is a "natural release."
Allow the main body of your all-in-one-pot to cool down and the float valve to lower.
The time for this approach can vary from 10-40 minutes, or sometimes longer.
Once you have confirmed that the float valve has lowered, put on oven mittens and move the internal pressure release vent to the "Venting" position.

Wait a moment to make sure all of the internal pressure has been released.
While holding onto the lid handle, slowly turn the lid to the "Open" position and lift it off.

The second way is a "quick release."
Once the steam cooking has finished, press the "Cancel" button.
**Please use caution when doing the following step.
Put on oven mittens and move the internal pressure release vent to the "Venting" position.
Hot steam and water will be released out of the vent very quickly and you don't want any of that to get on you.
Step back from your all-in-one-pot after moving the vent and monitor the steam coming out of the vent.
As the steam coming out starts to slow, monitor the position of the float valve.
After confirming that the float valve has lowered and there isn't any more steam releasing out of the vent, you're ready to open the pot.
The time for this approach can vary from 2-3 minutes, or sometimes longer.
With your oven mittens on, remove the lid and set it aside.
Remove the steaming basket and cooking utensils.
Take out the sterilized pot and discard the water.
Set aside the sterilized cooking utensils until you finish Step Three.
Put the sterilized pot back into your machine and when the soaking time is up, you're ready to move onto steaming.
How to Make Wara Natto - Step Three
The third step is steaming the soybeans.
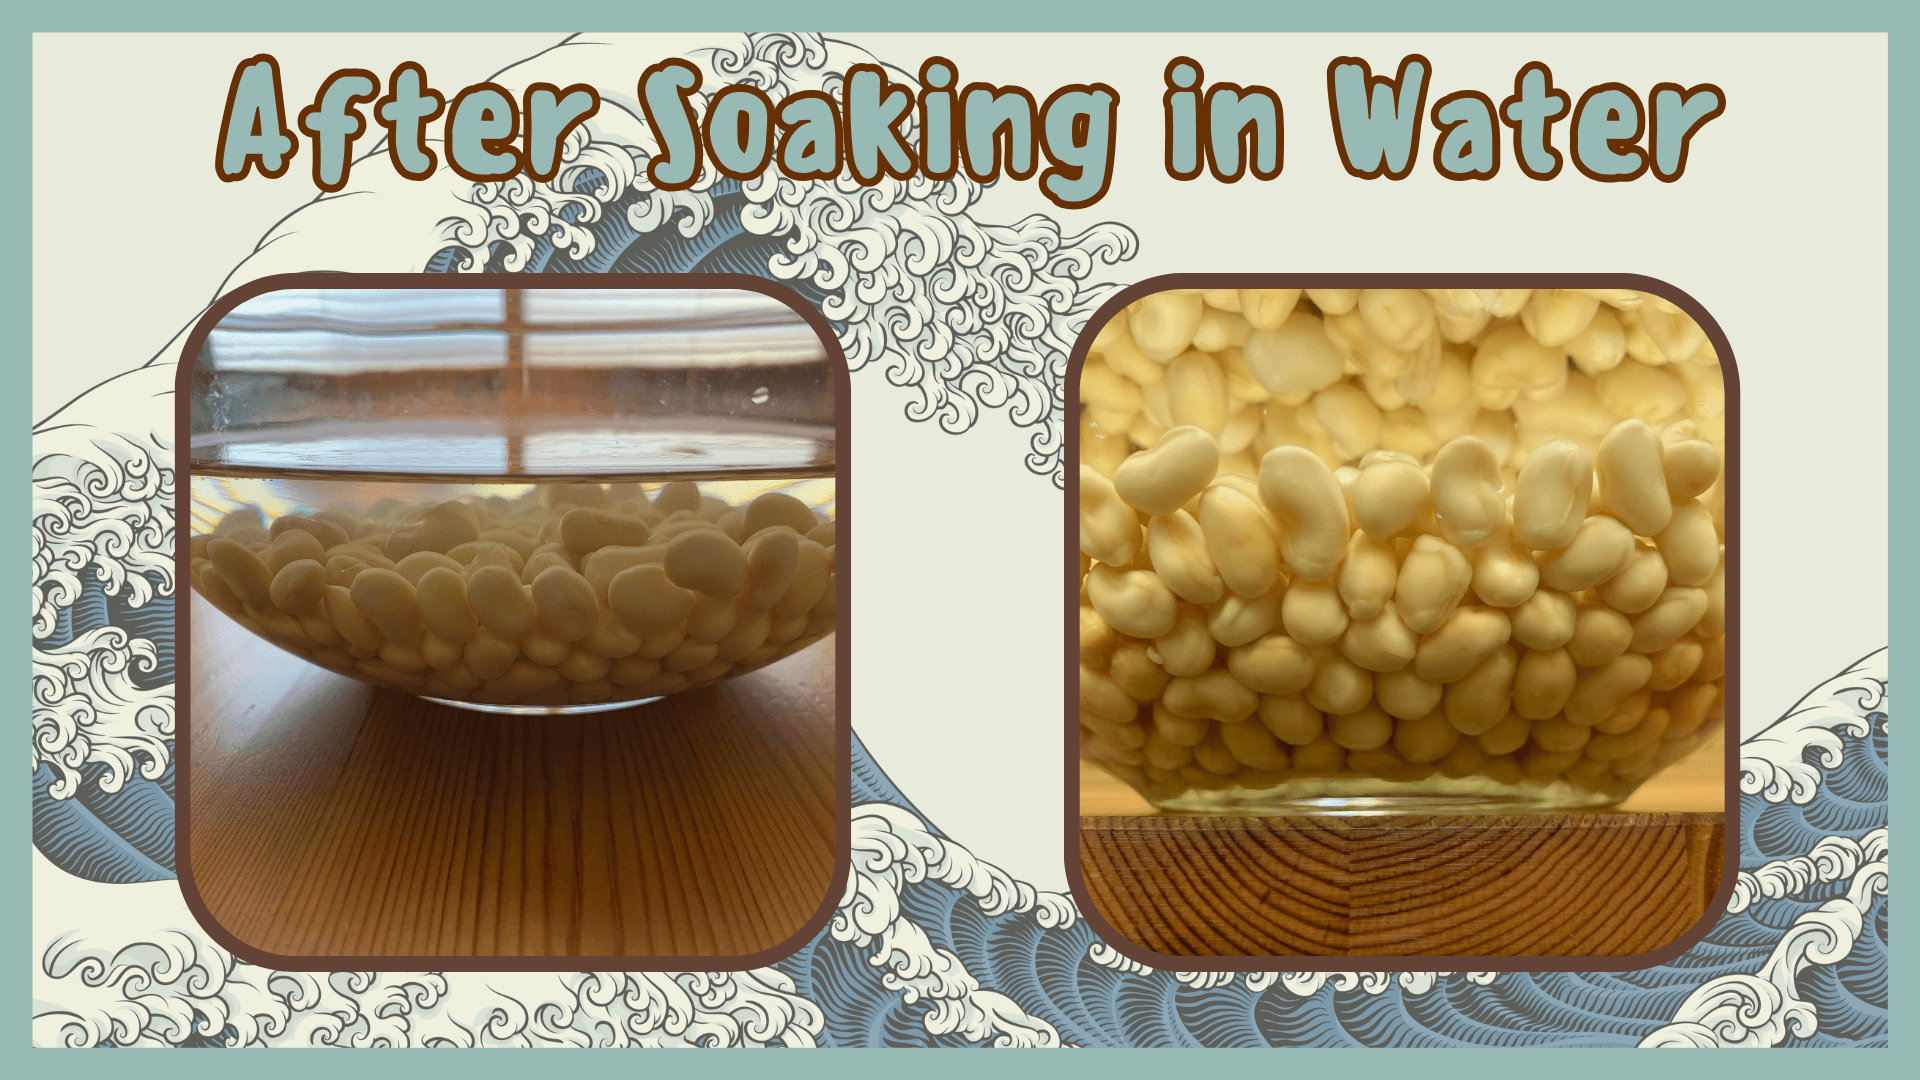
After the soybeans have been soaking for 18-20 hours you should notice that the beans have expanded and the water level has lowered.
This is a good sign because it means the soybeans absorbed the water, and now you're a step closer to making your own homemade wara natto.
Next up: Steam Time!
Take out a strainer and drain the water from the bowl.
Look over the soybeans and remove any bad ones or any skin that has fallen off.
Put the beans into your stainless steaming basket.
Fill a measuring cup with 355ml (1.5 cups) of cold water and pour it into your all-in-one-pot.
Then put the steaming basket inside the pot.

**Let's repeat the steps you took in Step Two to sterilize your stainless pot.
Securely close the lid and make sure the vent is in the "Sealing" position.
Select the "Steam" function and press the (+) or (-) buttons to set the timer to 70 minutes.
After a few seconds "On" will display on your all-in-one-pot screen.
It will take about 10 minutes or so for the 70-minute timer to be displayed and for the steaming to start.
**After the time is up don't open the lid right away.
**Remember that the pressure inside your all-in-one-pot needs to be released first.
**Refer to Step Two for the two ways this can be done.

After completing one of the two ways to release the inner pressure in your all-in-one-pot, gently lift the lid and take out a soybean to check the tenderness of the bean.
Put the lid back onto your all-in-one-pot to keep the rest of your soybeans from cooling down.
Squeeze the bean between your thumb and index finger.
You're looking for the beans to be soft, but not mushy.
Once you've confirmed the softness of the bean, you're ready to move on to Step Four.
Simply Natto is a participant in the Amazon Services LLC Associates Program,
and as an Amazon Associate I earn from qualifying purchases.
How to Make Wara Natto - Step Four
The fourth step is preparing your "Wara Canoes."
While the soybeans are steaming, it's a good time to make your "wara canoes."
Start out by taking a handful of rice straw and tie one end of the bundle.
Repeat this step until you have tied off 5-6 bundles.
Next, you'll want to tie off the opposite end of each bundle.
When you have finished tying off all of your bundles, make an opening in the middle of each bundle for the steamed soybeans to go into.
With your "wara canoes" all made, it's time to boil some water.
OPTION #1: Use a kettle
Place your "wara canoes" in an empty pot or pan and pour the boiled water over each of the "canoes."
*Make sure the hot water is poured over the entire "wara canoe" and not just the middle where the soybeans will be placed.
OPTION #2: Use a pot
Bring a pot of water to a boil and then using tongs, dip each "wara canoe" into the pot.
*Dip each "wara canoe" 1-2 times into the boiling water.
By bringing the wara into contact with hot water, the Bacillus subtilis natto found naturally in the rice straw is activated.
The wara is now your natto starter.
With your "rice straw canoes" warmed up by the hot water and your soybeans steamed, it's time for Step Five.
How to Make Wara Natto - Step Five
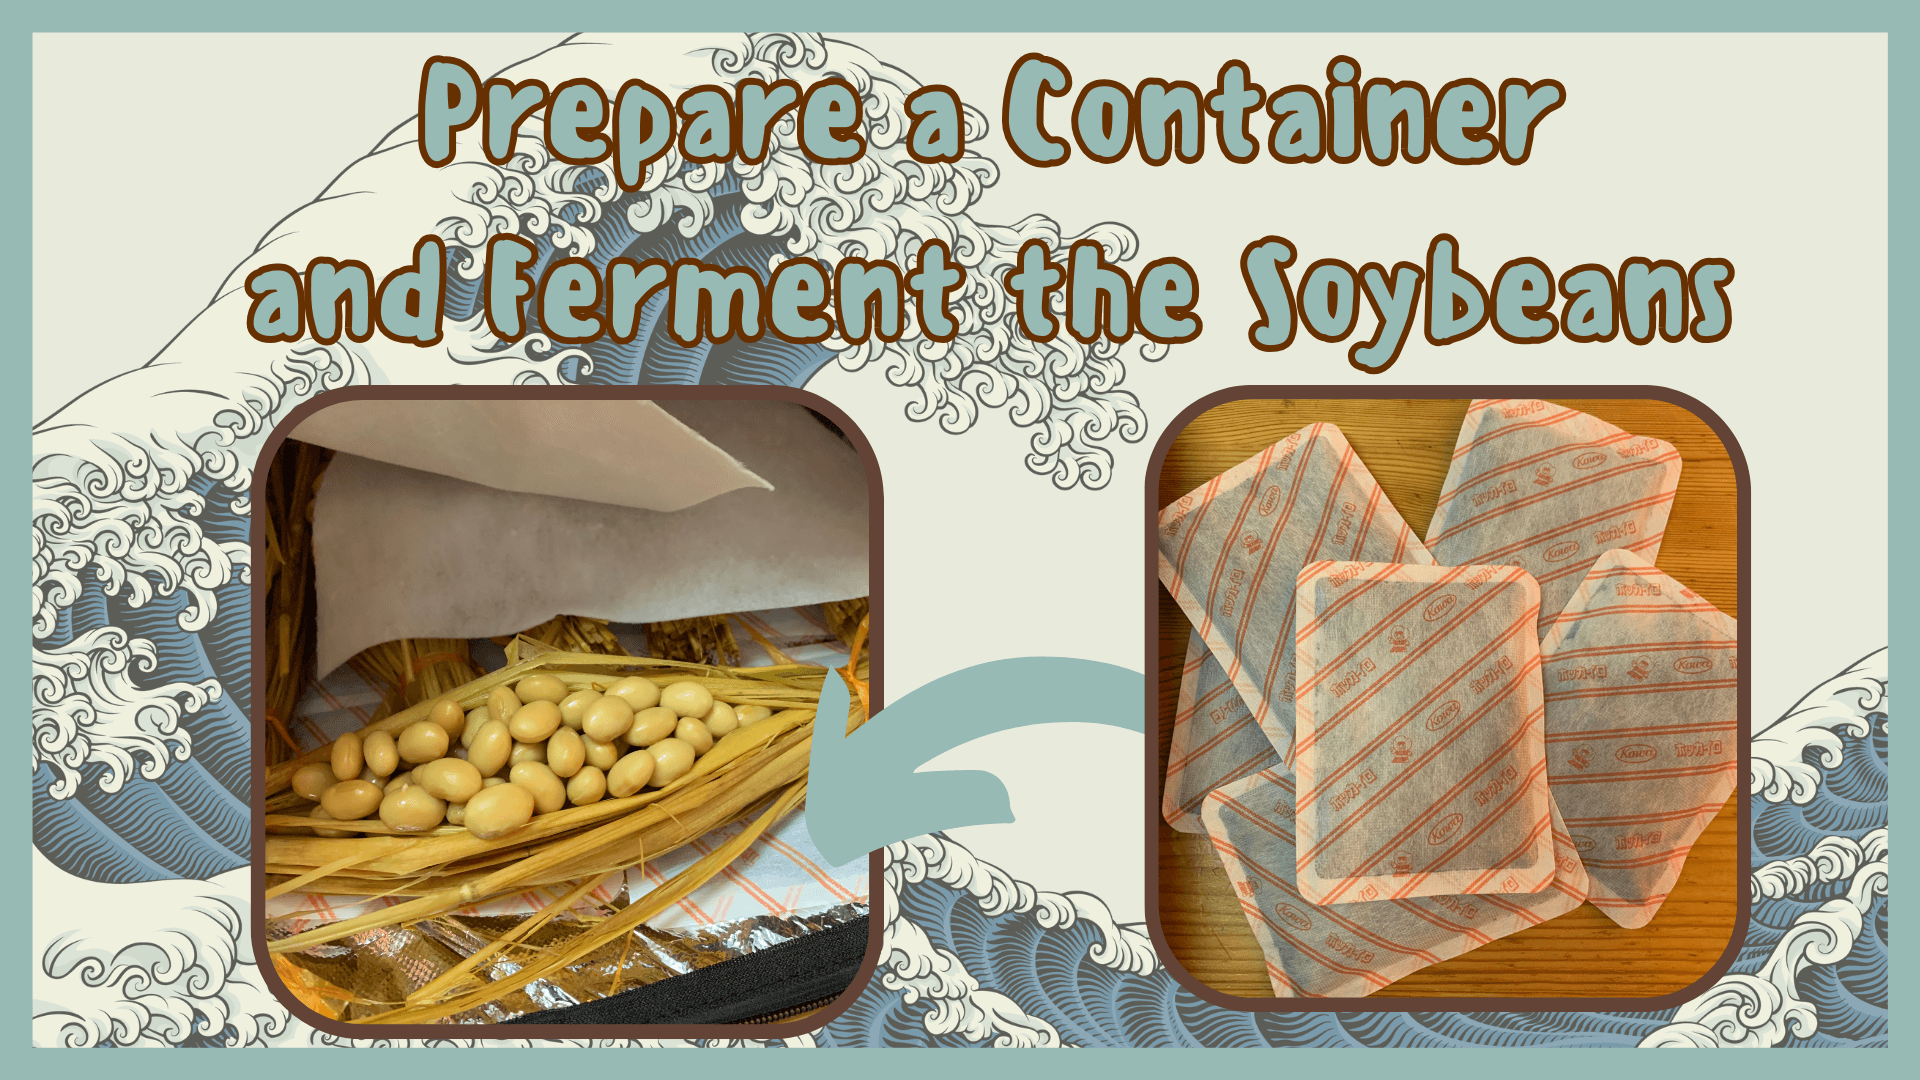
The fifth step is to prepare a container and ferment the steamed soybeans.
In this step, you'll need to prepare a container for your "wara canoes" to be put in while the soybeans are fermenting.
The container also needs to be able to retain heat.
For my "wara canoes" I used a thermal bag that I purchased through Amazon Japan.
In order to keep the inside of the container warm, you'll need to prepare hot pads (i.e. hand warmers).
Since you'll need to keep the "wara canoes" warm at a stable temperature for approximately 24 hours, look for hand warmers with a longer usage life.
The ones I found last for 24 hours and I don't need to change them out during the fermentation process.
Altering the inside temperature by opening and closing the container can affect the fermentation process and cause the Bacillus subtilis natto to slow down and stop doing its job effectively.
By keeping the temperature inside the container stable and the Bacillus subtilis natto happy, you'll have a higher success of your wara natto turning out right.
36˚C - 40˚C / 96.8˚F - 104˚F is the appropriate temperature range
for the fermentation process.
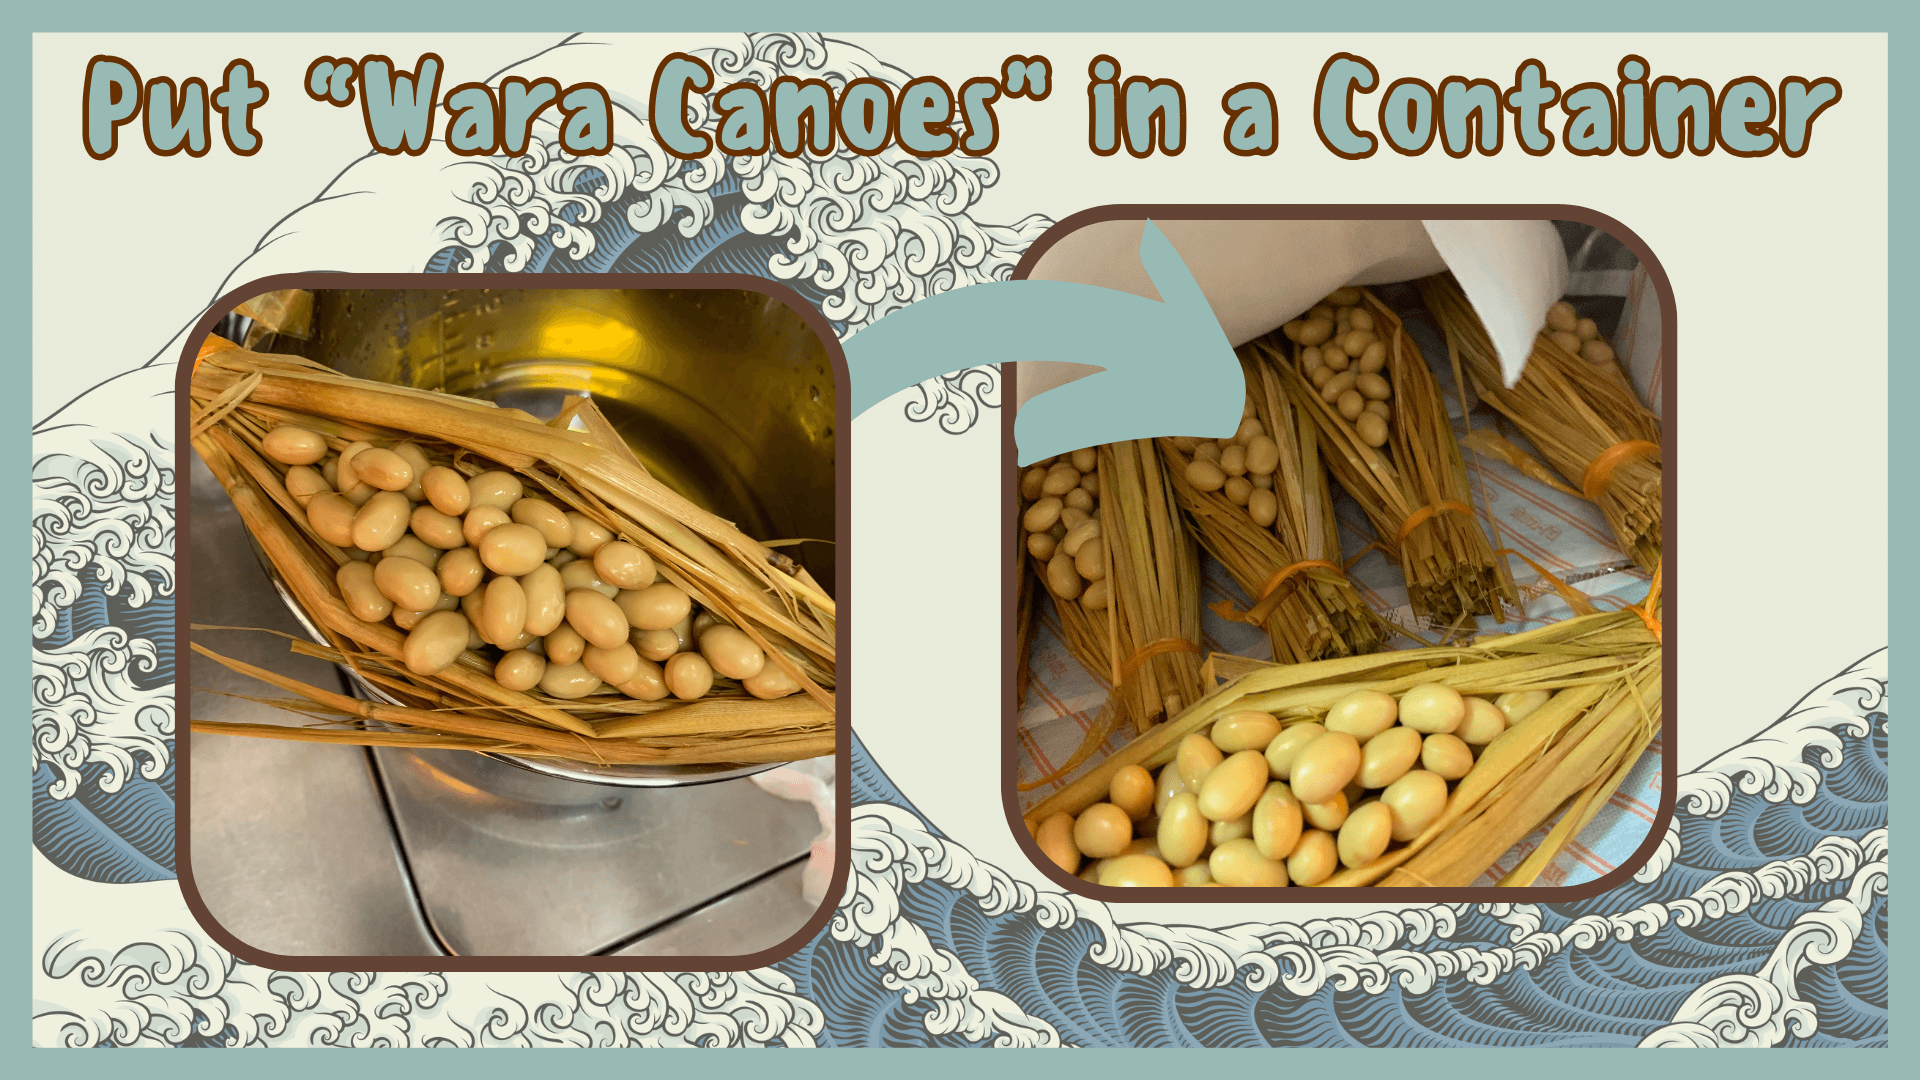
Place the hand warmers in the container you have prepared and grab one "wara canoe."
Open the lid of your all-in-one-pot and scoop out some steamed soybeans.
Put the steamed soybeans into the middle of the "wara canoe."
*Put enough so that the beans are just above the opening.
To keep the steamed soybeans from cooling down too much, place the lid back onto your all-in-one-pot.
Place the full "wara canoe" into your container and then continue the previous steps for the remaining "rice straw canoes."
After you have all of your "wara canoes" in the container you have prepared, place a few sheets/pieces of cooking paper over the "canoes."
Securely close the lid of your container.
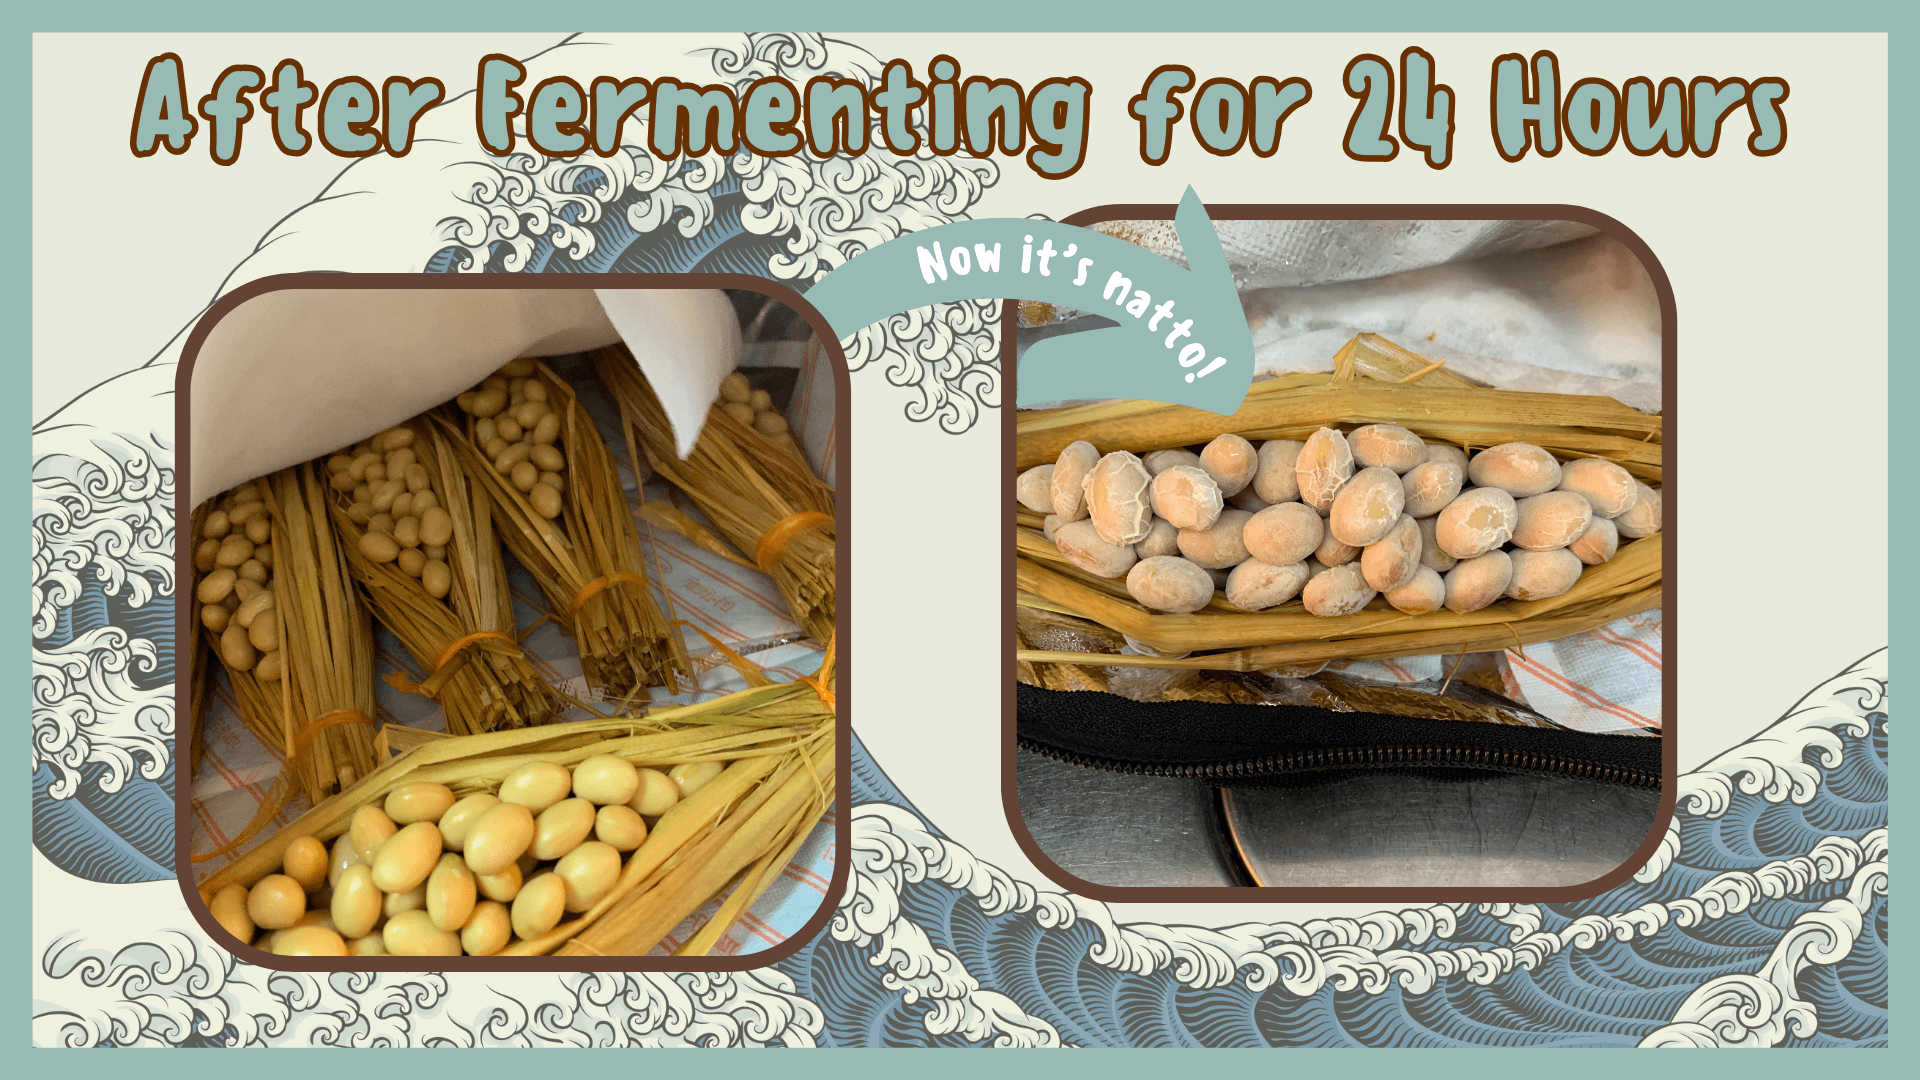
Now you're 24 hours closer to making your very own homemade wara natto.
When the time is up, you're ready to move onto Step Six.
Simply Natto: Natto Lingo

沸かす
(wakasu)
"wa-kaw-sue"
- boil
お湯
(oyu)
"oh-you"
- hot water
発酵させる
(hakkosaseru)
"hawk-co-saw-say-roo"
(slightly roll the "r" in "roo")
- ferment
温度
(ondo)
"own-doe"
- temperature
How to Make Wara Natto - Step Six
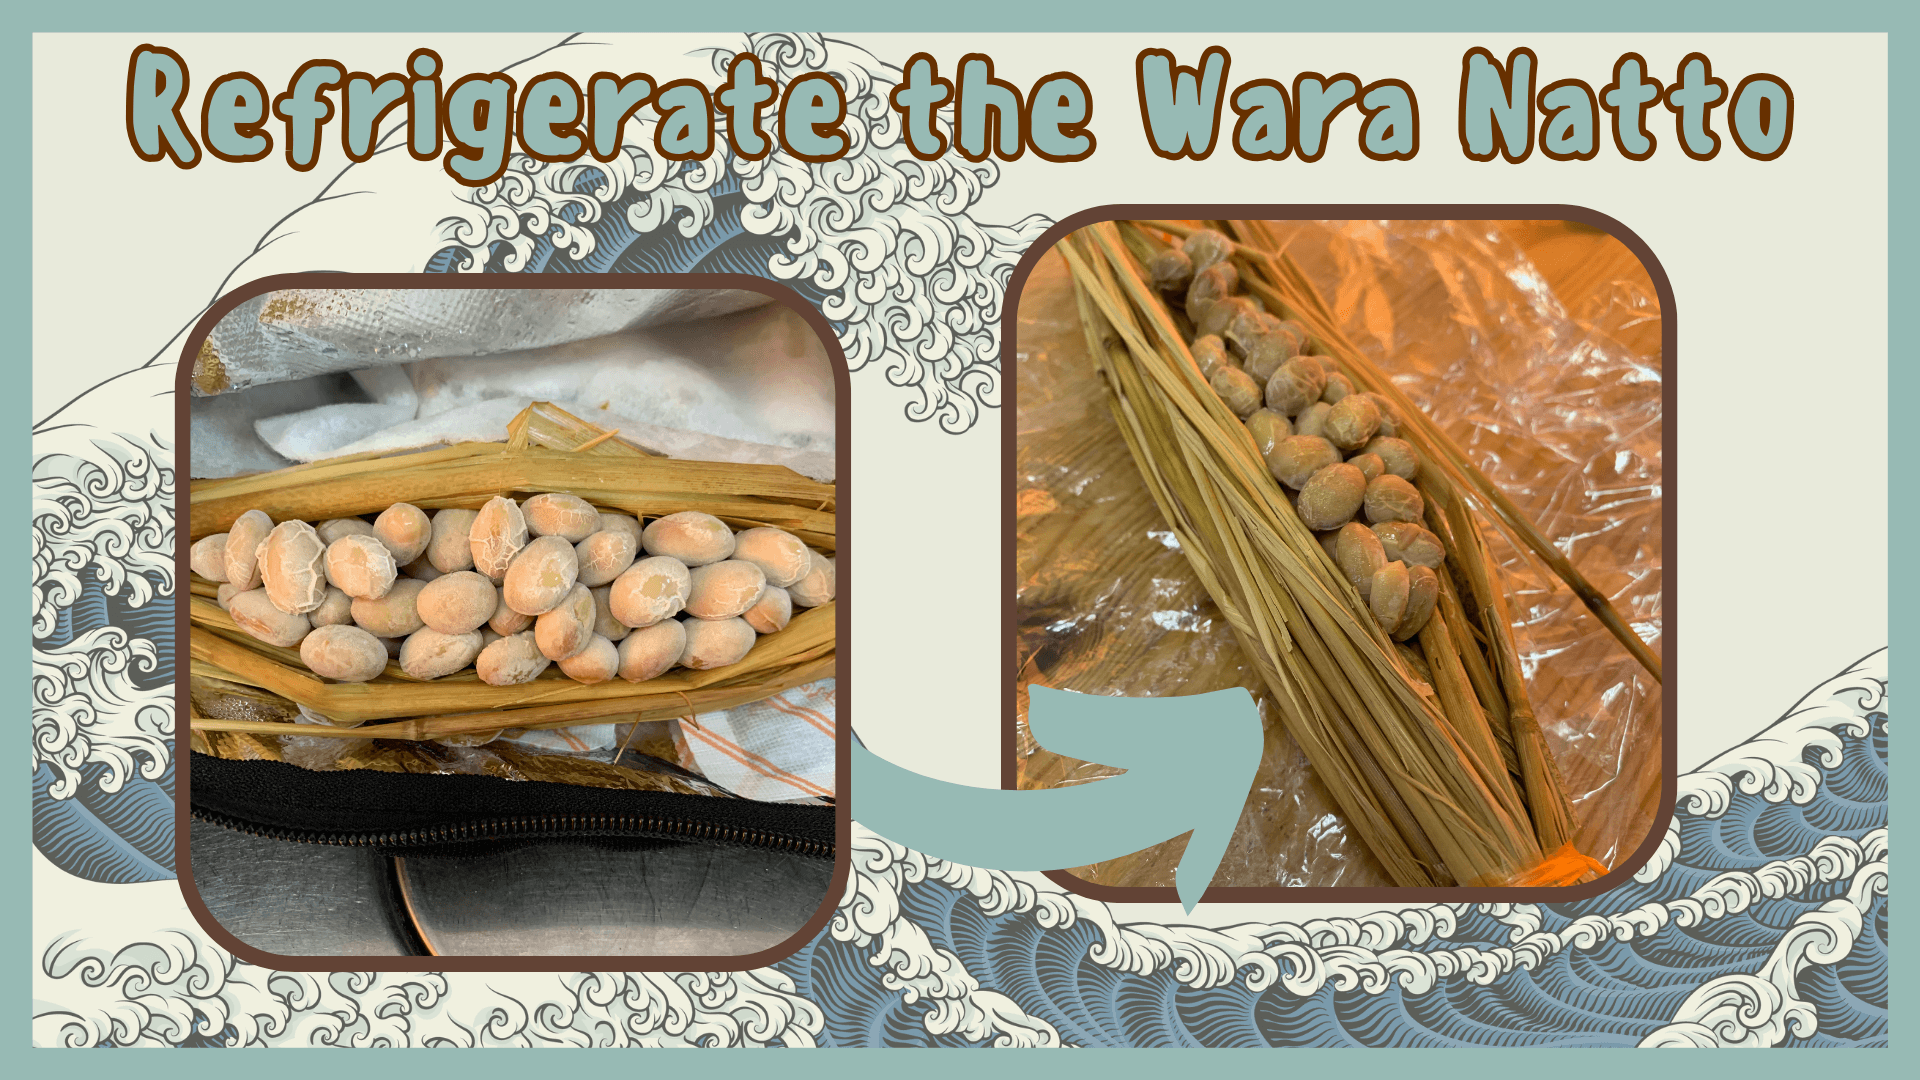
The sixth step is to transfer your freshly fermented rice straw natto to the fridge.
After your soybeans have been fermented for 24 hours you should see a whitish film covering the beans.
There'll also be a slight ammonia smell from the fermentation, as well as a scent of wet straw.
Take 1-2 "wara natto canoes" out of your container and wrap them separately, or as a set, using clear wrap.
Put them in the fridge and then repeat the previous steps for the remaining "canoes."
Leave your homemade wara natto in the fridge for 24-48 hours before eating it.
This helps to remove the smell of ammonia and to stop the Bacillus subtilis natto from continuing to multiply.
It also enriches the "umami" of the natto.
Simply Natto: Natto Lingo

別々に
(betsubetsuni)
"beh-tsue-beh-tsue-knee"
- separately
旨味
(umami)
"oo-maw-me"
- taste, flavor, savoriness
How to Make Wara Natto - What to do Next?
With your homemade rice straw natto all made and put away in the fridge, it's time to clean up.
Clean your all-in-one-pot, the extra pot used for activating the Bacillus subtilis natto, cookware and tableware with an antibacterial dish soap.
Load the pot back in your all-in-one-pot and put the strainer inside the machine.
Place any stainless cookware and tableware into the strainer.
Repeat Step Two above and sterilize everything using the all-in-one-pot.
Spray the container you used for fermenting with a bleach/mold/mildew cleaner and let the solution sit for a bit.
Clean off the solution and then clean the container again using an antibacterial dish soap.
*It's good to give the container a thorough clean since a bacterium was used in the fermentation process.
Wash off all of the dish soap and set the container aside to air dry.
Want to know what to eat with your wara natto?
Try these unique natto dishes.
いただきます。 "ee-taw-daw-key-maas" - Let's Eat!
Keep up with the latest Natto Goodness by following Simply Natto on social media
The Latest Natto Talk
-
Natto Food with Sauces and Spices
Natto food with sauces and spices is a traditional and simple way for you to enjoy natto. It's a great way for you to savor some fermented soybean goodness. -
How to Make Wara Natto
Let's learn how to make wara natto. For centuries, Japanese natto has been made using rice straw, and now you can make it too. -
How to Make Natto with an All-In-One-Pot
Let's learn how to make natto! I'm going to show you how to make your own sticky, stringy beans using an all-in-one-pot. -
How to Make Hojicha Natto
Let's learn how to make hojicha natto! I'm going to teach you how to make your own sticky, stringy beans with a roasted green tea twist in 6 easy steps. -
How to Make Coffee Natto
Let's learn how to make coffee natto! I'm going to teach you how to make your own sticky, stringy beans with a java twist in 6 easy steps.
